

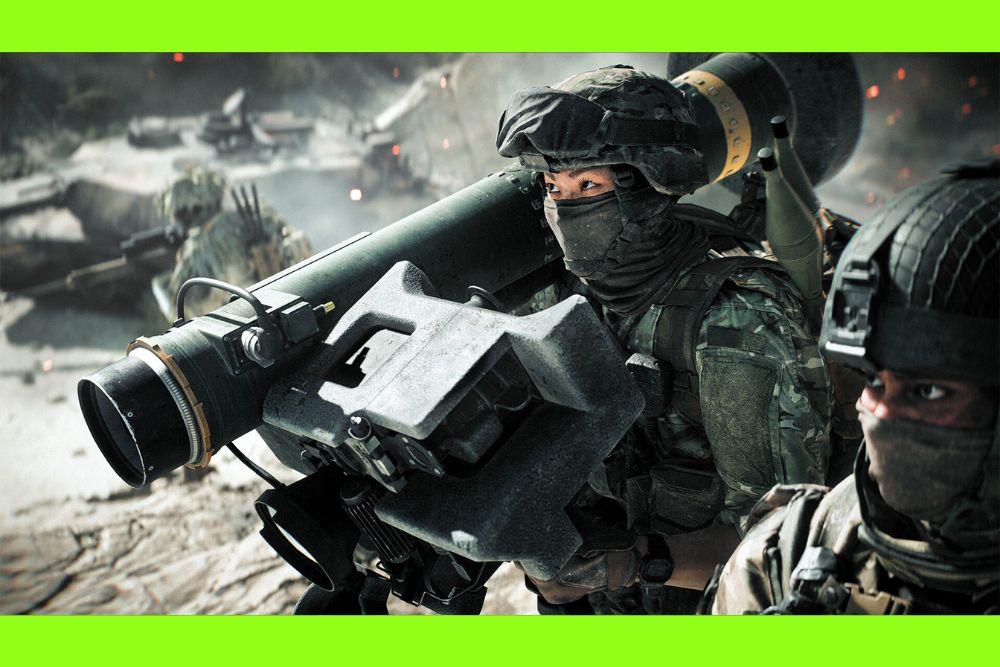
Battlefield 6 arrived swinging, and one thing quickly became obvious: the loadout system matters more than ever.
Between the Pick 100 attachment economy, varied maps and vehicles, and the class paths that change your role on the battlefield, winning consistently is as much about choosing the right setup as it is about aim.
Below I break down the best, battle-tested Battlefield 6 loadouts for each role and explain the thinking behind the choices so you can adapt them to your playstyle.
Quick primer: Pick 100 and why attachments feel meaningful
Battlefield 6 uses a Pick 100 system for weapon attachments. Each weapon effectively has a points budget and every attachment costs a number of points.
That means you cannot slap on every single upgrade and call it a day. Instead you are forced to make trade-offs. Do you want recoil control and accuracy for long-range engagements or mobility and hip-fire for close quarters?
The Pick 100 system rewards deliberate choices and situational builds rather than blanket meta stacking.
How I picked these Battlefield 6 loadouts
I focused on weapons that consistently appear on community tier lists and guides, then selected attachments and gadgets that solve the weapon’s main weaknesses.
For each class I include a primary weapon, essential attachments within a 100-point mindset, training path or perk suggestions, and tactical tips. Where appropriate I call out alternatives so you can tweak based on personal preference or specific maps.
The weapon recommendations below reflect what is widely considered strong in the current BF6 meta.

Assault: M4A1 — reliable mid-range
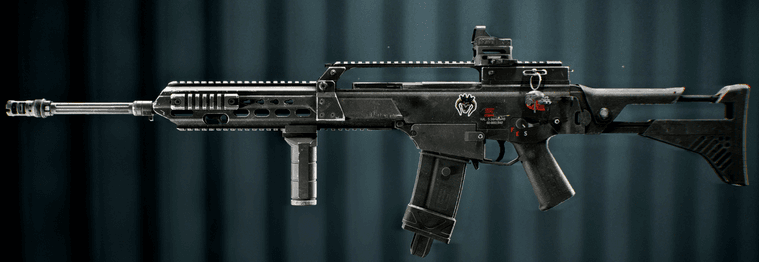
Why pick it: The M4A1 is versatile, accurate, and forgiving when you miss a burst. It performs well across most distances, which makes it perfect for objective play.
Suggested attachments (pick for balance)
- Muzzle: Compensated Brake or Standard Suppressor (if stealth matters)
- Barrel: 16 to 20 inch fluted / heavy barrel for better bullet velocity and accuracy
- Underbarrel: Classic Vertical Grip or Angled Grip to control recoil
- Optic: 1.5x to 2.5x red dot or low-power scope depending on map scale
- Magazine: 30-40 round mag with fast mag if you play aggressively
Gadgets and path
- Gadget 1: Medical kit or Stim injector (Frontliner path if you want aggressive sustain)
- Gadget 2: Deploy Beacon for squad mobility or Breach charge for entry
- Training Path: Frontliner if you like pushing objectives; choose Adrenaline for survivability
Tactical notes: Use the compensated brake if you need to keep full ADS control during medium-range fights. If you prefer stealthy flanks, a suppressor and reduced muzzle flash will help you avoid being pinged by Recon.
This gun is forgiving — focus on controlled bursts at range and hipfire when entering rooms.
Support: M277 — sustained fire and objective control
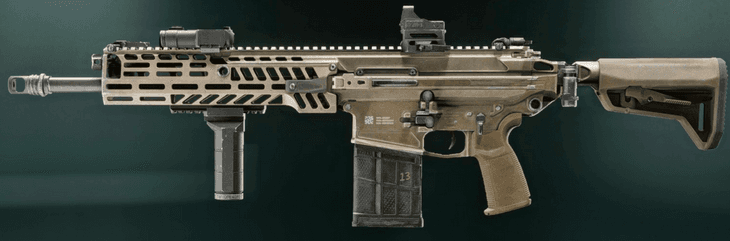
Why pick it: Support is widely regarded as one of the most impactful classes because it provides heals, ammo and consistent presence.
The M277 is one of Support’s staple weapons when you need sheer stopping power and sustained presence on points.
Suggested attachments
- Muzzle: Double-Port Brake to tame recoil
- Barrel: Heavy Extended 16 inch for improved accuracy and projectile speed
- Underbarrel: Alloy Vertical Grip to reduce recoil while staying mobile
- Magazine: 25 to 50 round fast mag depending on how much reload penalty you can accept
- Optic: Low magnification red dot or low-power holo to keep aim clear on objectives
Gadgets and path
- Gadget 1: Ammo crate or deployable ammo depending on map flow
- Gadget 2: Proximity sensor or Sentry tool if you defend choke points
- Training Path: Combat Medic if you want to keep the squad in the fight longer
Tactical notes: The M277 can feel heavy at first because of recoil and default mag sizes. Prioritize recoil control and mag upgrades so you can stay in the fight. Paired with a Support that drops ammo packs and revives, this setup dominates hold-the-point fights.
Engineer: PW7A2 (SMG) — anti-vehicle and close-quarters specialist
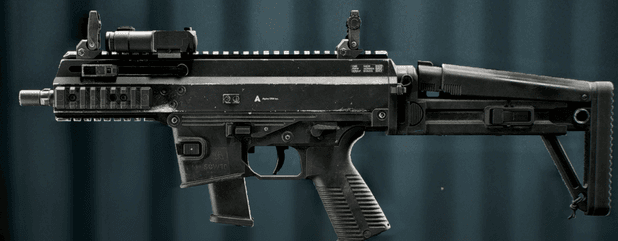
Why pick it: Engineers now straddle anti-vehicle and close-quarters roles more flexibly. The PW7A2 is a top SMG for mobility and hip-fire supremacy, which makes it perfect for clearing infantry near vehicles while carrying anti-armor gadgets.
Suggested attachments
- Muzzle: Suppressor or Flash Hider if you want stealth
- Barrel: Short barrel for handling and hip-fire accuracy
- Grip: Angled grip for quick ADS transitions
- Magazine: 40-round magazine for sustained fights
- Ammo: Soft point or standard depending on whether you want penetration
Gadgets and equipment
- Gadget 1: RPG-7V2 or SMAW for hard vehicle denial
- Gadget 2: Anti-vehicle mines or Tank EMP if you want to zone armor
- Training Path: Anti-Armor path to maximize explosive effectiveness
Tactical notes: Engineer players should prioritize position control around vehicle spawns and choke points.
Use mobility to get behind enemy armor and force them to turn, then land the disabling hits. Your SMG is for close clearing and the rockets are for denying armor dominance.
Recon: M2010 ESR — the long-range scalpel
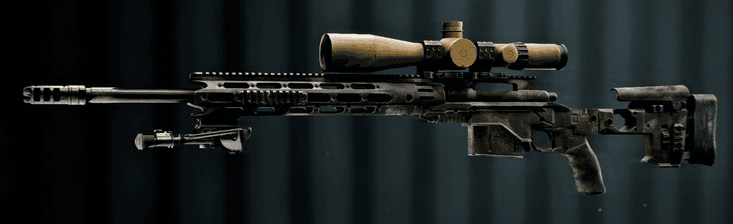
Why pick it: If you want to affect the battle from a distance and punish enemy movement, the M2010 ESR is the top sniper option.
It pairs range, stability and modular attachments to make long-range picks reliable..
Suggested attachments
- Optic: NFX 8.00x or similar high-magnification scope
- Barrel: 26 inch carbon barrel for ballistic performance
- Muzzle: Compensated Brake for shot stability
- Magazine: 5-RND or match-grade rounds to maximize one-shot potential
- Left accessory: Range Finder for quick distance calculations
Gadgets and path
- Gadget 1: Motion Sensor to cover your flanks
- Gadget 2: Claymore or proximity mine if you hold a position
- Training Path: Sniper for lethality perks and aiming assists
Tactical notes: Snipers should always account for bullet drop and travel time.
Use rangefinder and bipod when possible to stabilize. If the map is smaller, pick a semi-auto marksman rifle and a lower magnification optic to remain useful.
Specialist picks and niche loadouts
- Vehicle hunter: Engineer with DMR or full-powered rifle plus anti-tank missiles. Swap to armor-piercing ammo and heavy barrels for increased projectile speed.
- Close quarters lurker: SMG with laser sight, hipfire mag and suppressor, plus a throwable for breaching. Mobility is king here.
- Objective anchor: Support with LMG and bipod attachments, ammo deploy and defensive gadgets like deployable cover. This is the best setup for holding flags under pressure.
Practical tips for building your personal meta
- Test attachments on the firing range. The cost-based Pick 100 system makes small changes meaningful. Find a balance that matches the maps you play.
- Adapt by map and role. What works on wide-open maps will fail in close-quarters. Keep two variants of your main loadout for different map types.
- Coordinate with squad. A Support dropping ammo and a Recon marking targets makes a scary pairing for enemies.
- Watch how the community shifts. The meta evolves fast. Use tier lists and weapon guides to spot trends, but don’t copy blindly. Learn why a change works for your playstyle.
There is no single absolute best loadout in Battlefield 6. The Pick 100 system, varied maps, and the interplay between infantry and vehicles mean the strongest players are those who can tweak builds and think tactically.
The loadouts above represent reliable, meta-backed starting points that you can tune to your aim, map, and team composition.
Use them as a foundation, then tweak attachments and gadgets until the weapon feels like an extension of your playstyle.
Play Battlefield 6 with reduced ping and optimized FPS! Download NoPing now and start your free trial!