
If you’ve ever tried to adjust the refresh rate on your device to improve your gaming experience, you're already on the right track.
Refresh rate plays a massive role in how smooth and responsive your screen feels, especially when you're deep in competitive online matches.
Whether you're playing a fast-paced shooter or exploring vast open worlds, your display's refresh rate can make or break the experience.
In this guide, we're going to walk through how to adjust the refresh rate on different platforms: Windows, Mac, Android, and iPhone. Plus, we’ll give you a quick tip on how to squeeze even more performance out of your gaming setup.
What Is Refresh Rate and How It Impacts Gaming?
Let’s break it down real quick. The refresh rate, measured in Hertz (Hz), is the number of times your screen updates the image per second.
So, if your monitor or phone is set to 60Hz, it refreshes 60 times per second.
Why should gamers care? Because a higher refresh rate usually means smoother motion. It reduces motion blur and input lag, two things that can seriously mess with your accuracy and reaction time in online games.
If you’ve ever felt like your controls were sluggish or your screen was “choppy,” chances are your refresh rate had something to do with it.
Here’s a basic comparison:
- 60Hz – Standard for many devices. Okay for casual use but not ideal for fast-paced gaming.
- 120Hz or 144Hz – Much smoother. Great for competitive gaming.
- 240Hz+ – Ultra-smooth and responsive. Mainly used by hardcore gamers and eSports players.
Reasons Why You Need to Adjust The Refresh Rate
Now that we know what refresh rate does, let’s talk about why you'd want to tweak it.
1. Better Gameplay Experience
Higher refresh rates reduce screen tearing and input delay, giving you a more fluid and responsive gaming session.
2. Match Your Hardware
If your monitor supports 144Hz but your PC is stuck outputting 60Hz, you’re not using the full potential of your setup.
3. Reduce Eye Strain
A smoother display is easier on the eyes during long gaming sessions.
4. Fix Display Issues
Sometimes, games feel laggy or unstable, and it’s because your refresh rate and resolution aren't properly configured.
How to Adjust Refresh Rate on Windows (10 and 11)
Windows makes it fairly easy to change the refresh rate, but the menus can vary slightly between Windows 10 and 11.
For Windows 10:
- Right-click on the desktop and select Display settings.
- Scroll down and click Advanced display settings.
- Under “Refresh rate,” pick the highest option your monitor supports from the drop-down menu.
For Windows 11:
- Open Settings > System > Display.
- Scroll down and click Advanced display.
- Under Choose a refresh rate, pick the one that matches your monitor’s capabilities.
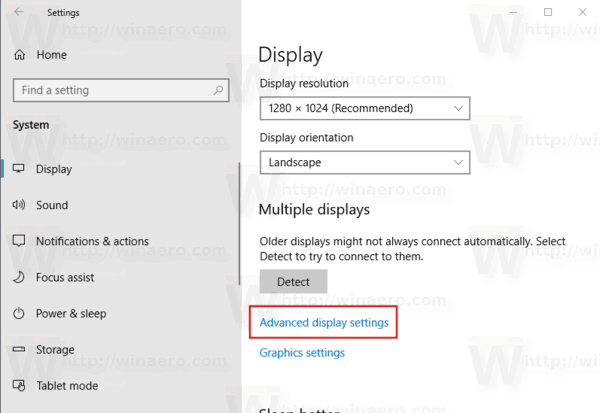
Source: Winaero
If you’re using multiple monitors, make sure to select the correct display at the top before changing settings.
Pro Tip: If your monitor doesn’t show higher refresh rate options, double-check that:
- You're using the correct cable (DisplayPort or HDMI 2.0+).
- Your graphics card drivers are updated.
- The monitor is set to performance mode in its built-in menu.
Microsoft’s official guide is also a great reference.
How to Adjust Refresh Rate on Mac
Mac users have fewer options, but you can adjust the refresh rate on certain Mac models, especially MacBook Pro devices with ProMotion displays or external monitors.
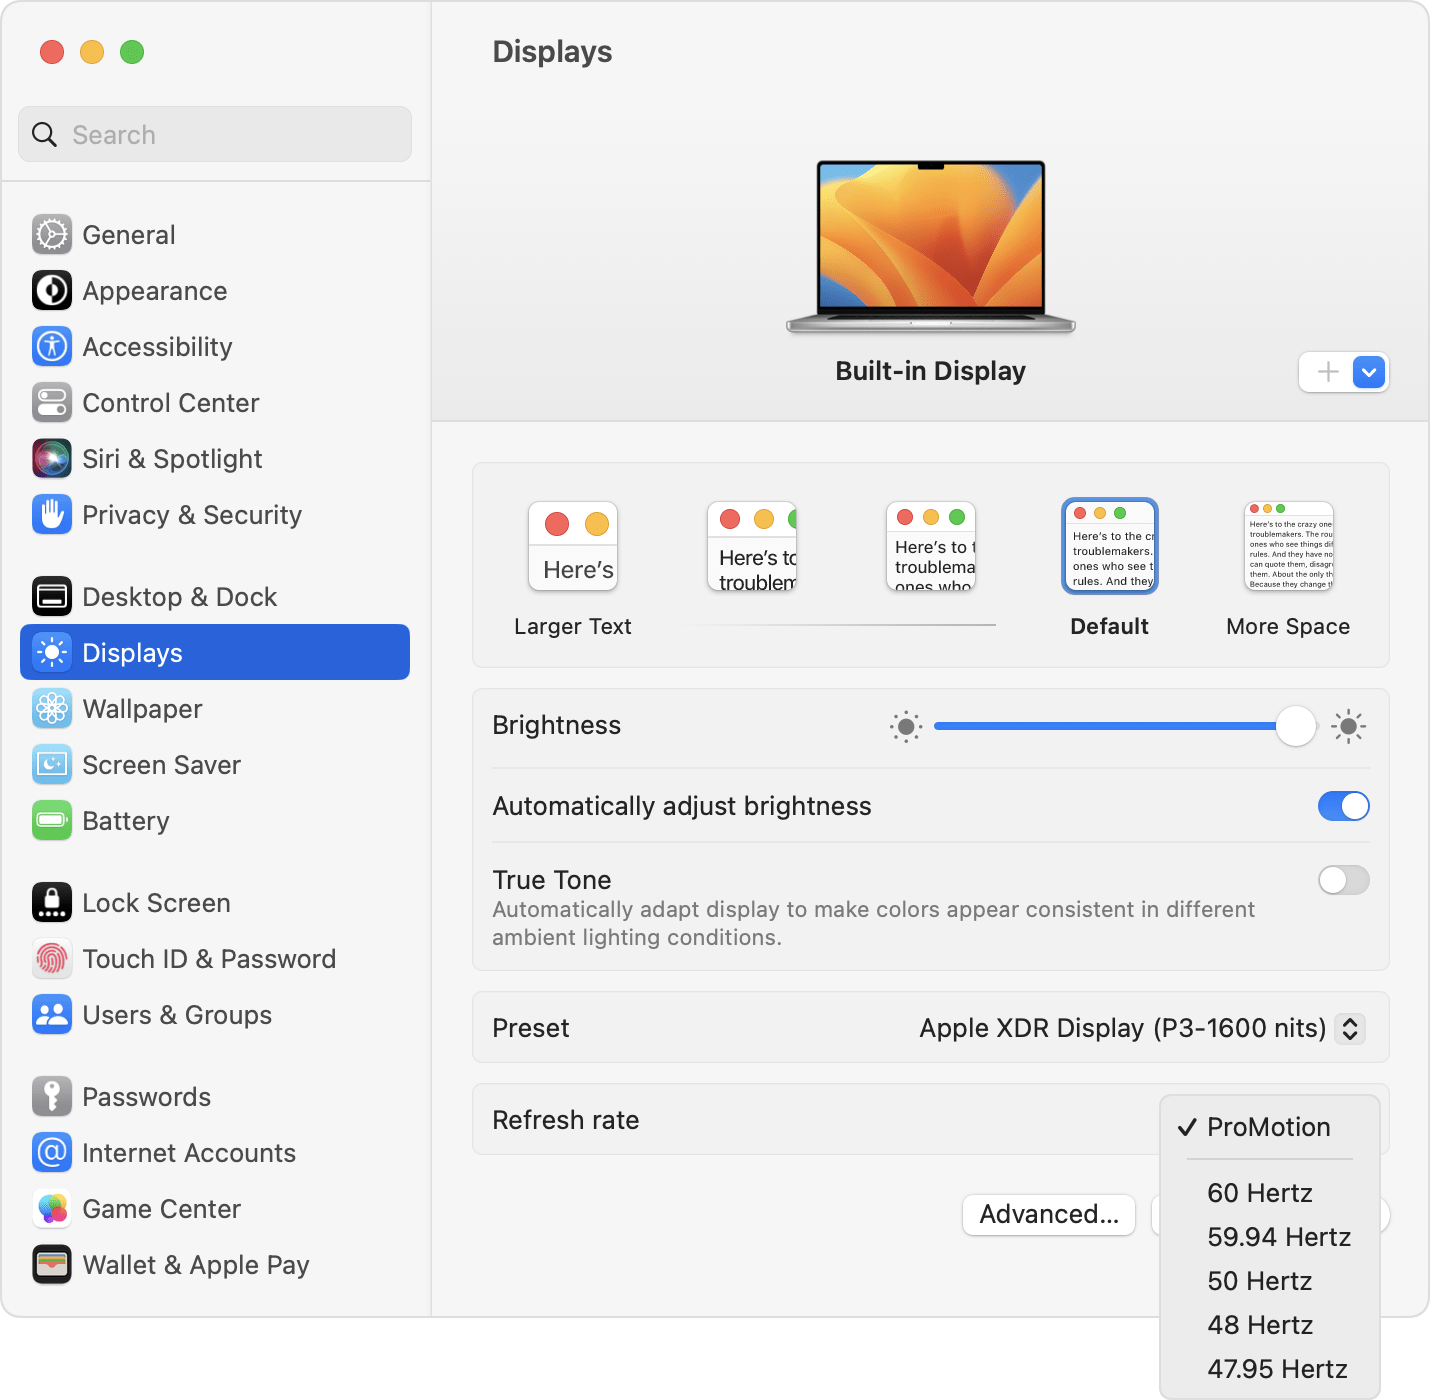
Here’s how:
- Click the Apple menu and choose System Settings (or “System Preferences” on older macOS versions).
- Go to Displays.
- Select the display you want to adjust.
- Hold down the Option key and click the Refresh Rate dropdown to see more choices (this step may be necessary depending on your macOS version).
- Pick the refresh rate you want.
Keep in mind:
- On built-in displays, refresh rate options may be limited to 60Hz or dynamic (up to 120Hz with ProMotion).
- On external monitors, make sure you’re connected via the proper cable and your monitor supports the chosen refresh rate.
You can check more detailed info on Apple’s support page.
How to Adjust Refresh Rate on Android
Modern Android phones often support high refresh rates like 90Hz, 120Hz, or even 144Hz. But in some cases, the phone automatically switches based on usage, which isn’t ideal for gaming.
To manually force the highest refresh rate:
- Go to Settings > Display > Motion smoothness or Refresh rate (label varies by brand).
- Choose the highest available option (e.g., 120Hz or “High”).
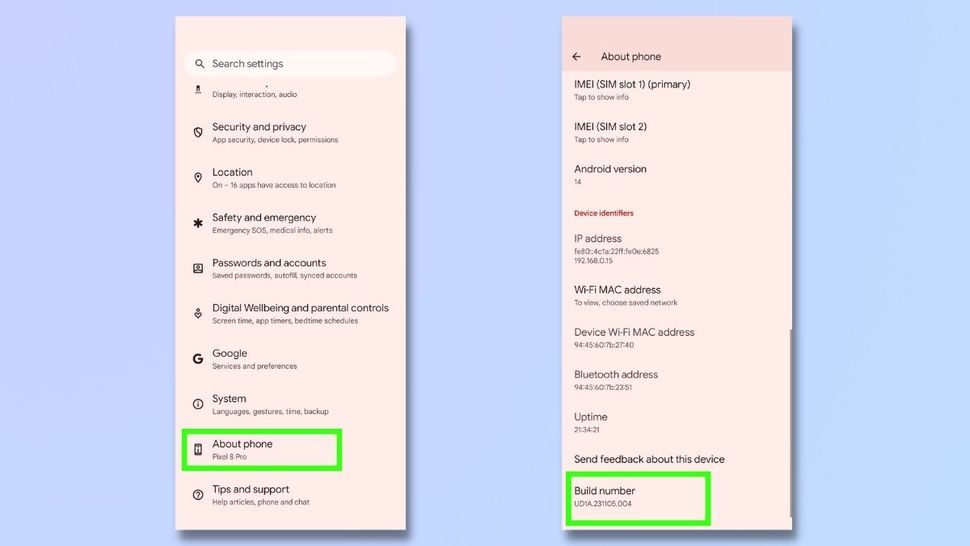
- If you don’t see the option, enable Developer Options:
- Go to Settings > About phone.
- Tap Build number 7 times.
- Go back to Settings, then System > Developer options.
- Scroll to Show refresh rate to confirm it’s using the peak rate.
This process might look slightly different on Samsung, OnePlus, or Pixel phones, but the core idea is the same.
For more guidance, check out this Tom’s Guide article.
How to Adjust Refresh Rate on iPhone
Apple made refresh rate management simple, and automatic, on iPhones that support ProMotion (iPhone 13 Pro and newer).
There’s no manual toggle to force 120Hz at all times, but here’s how to make sure it’s working:
- Go to Settings > Accessibility > Motion.
- Make sure Limit Frame Rate is disabled. If it’s turned on, your iPhone will cap at 60Hz.
That’s it. iOS dynamically switches between refresh rates based on the content on screen. While you can’t manually lock it to 120Hz, Apple’s implementation is pretty good at keeping games buttery smooth.
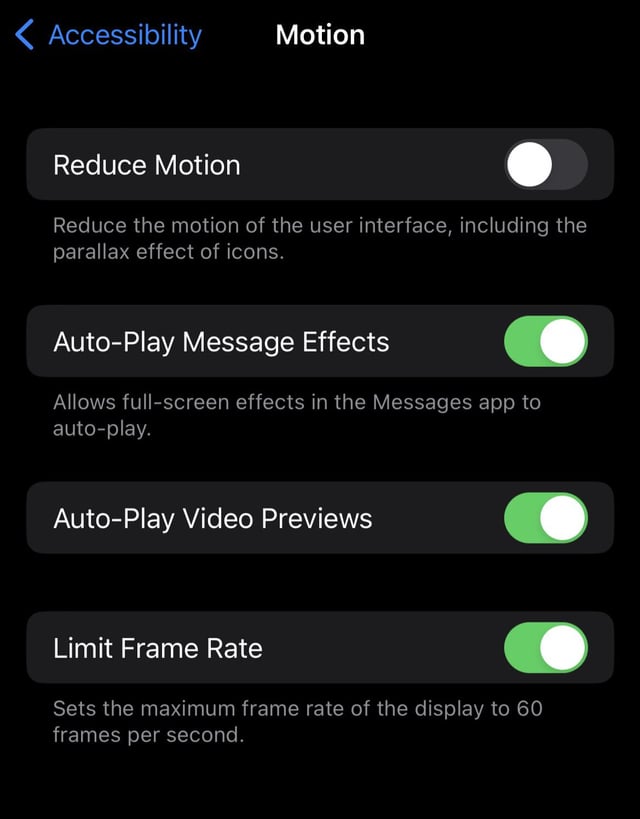
Source: Reddit
How to Improve Your PC Performance?
Adjusting your refresh rate is a great first step, but if you want to push your PC further for online gaming, there’s one more trick: NoPing’s Boost FPS feature.
NoPing is known for reducing ping and improving connection routes in online games, but it also offers a Boost FPS tool.
It tweaks system settings and background processes to help your PC focus entirely on performance while gaming. Think of it like giving your system a temporary power-up.
Here’s what Boost FPS does:
- Disables unnecessary services.
- Prioritizes game processes.
- Frees up RAM usage.
- Reduces CPU strain.
All of this can help you get more consistent frame rates and ensure that your monitor’s high refresh rate is being fully utilized. It’s especially handy for players who don’t want to dig into system settings manually.
How to use the Boost FPS feature:
- Sign-up through the website and download NoPing (you can test it for free).
- When you open the software, click on "Boost FPS" in the left side menu.
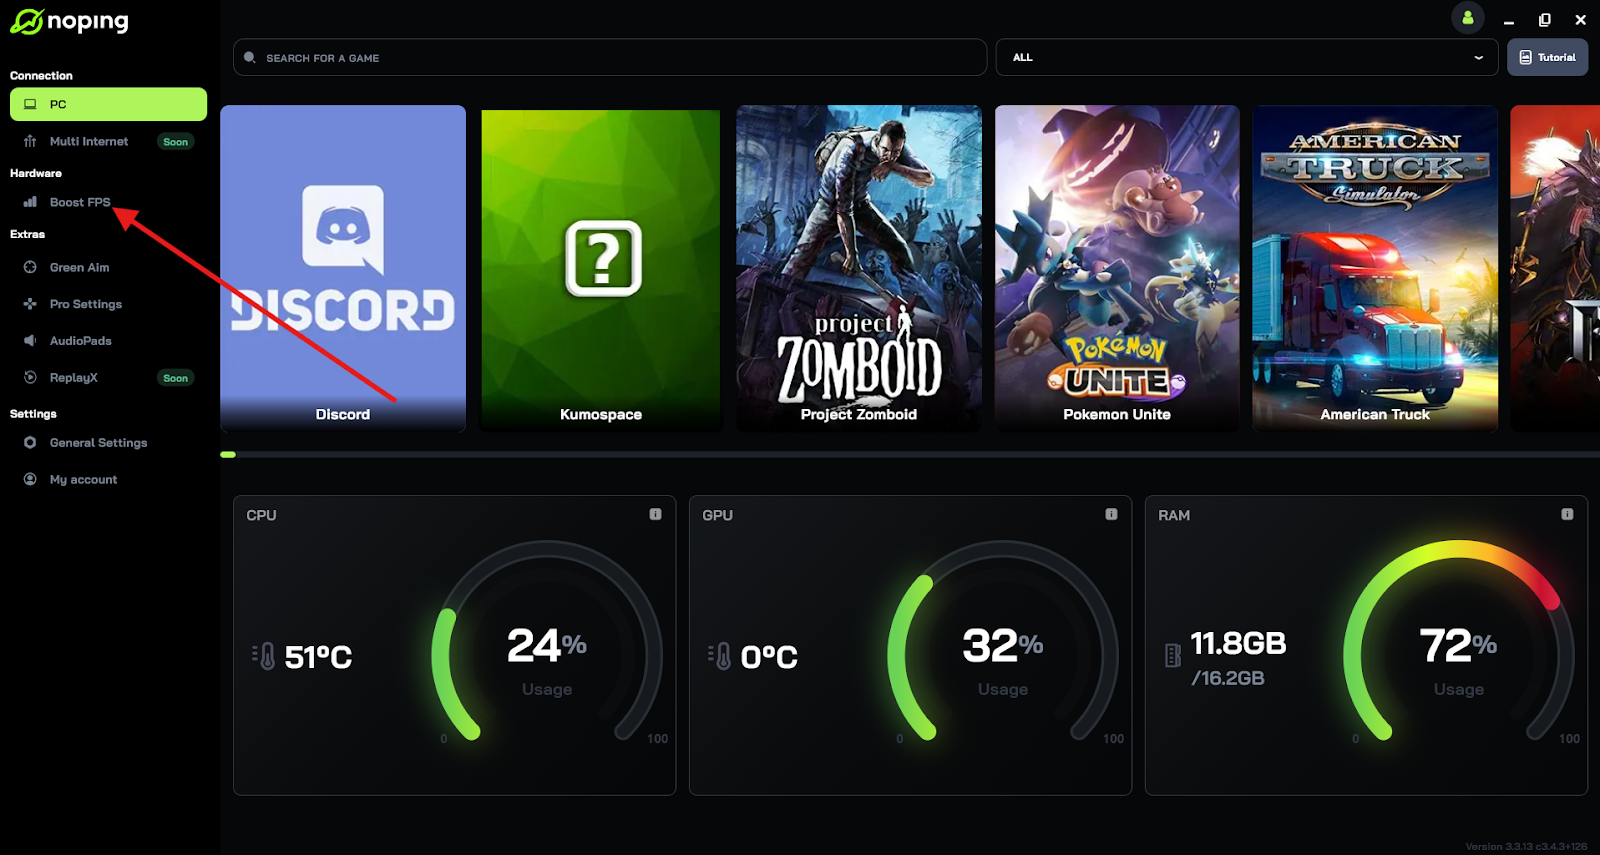
- On the next screen, you'll see a range of options to customize the feature (there are over 50 settings). You can enable or disable everything and choose between Windows default or user settings. You can also filter the options using the bar on the right.
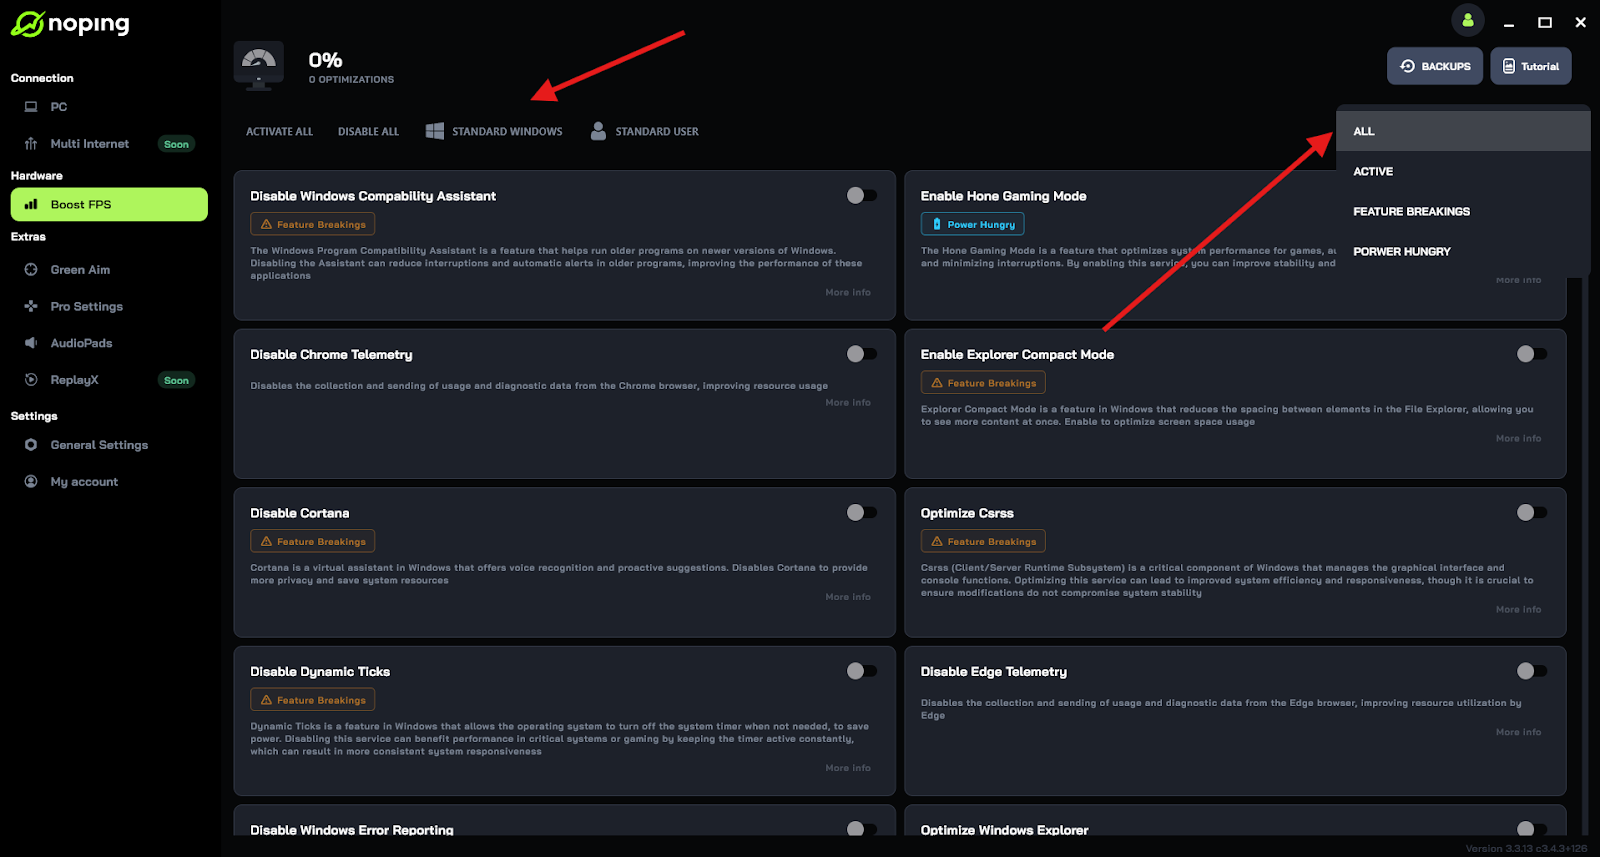
And that's it! Boost FPS is now activated. Just launch your game and enjoy high FPS!
Additional Notes
Monitor Settings
You may also need to adjust the refresh rate in your monitor's on-screen display (OSD) menu, especially if the monitor doesn't automatically sync with the operating system's setting.
NVIDIA Control Panel
If you have an NVIDIA graphics card, you can access the NVIDIA Control Panel to change refresh rates for specific displays.
HDMI Limitations
Some HDMI connections may not support higher refresh rates, so you might need to use a DisplayPort or DVI cable to achieve the desired refresh rate.
Variable Refresh Rate (VRR)
Some monitors support VRR (e.g., FreeSync, G-Sync), which automatically adjusts the refresh rate to match the frame rate, potentially reducing input lag and tearing.
Dynamic Refresh Rate (DRR)
Windows 11 also offers a DRR feature, which automatically adjusts the refresh rate based on the content being displayed.
Whether you’re gaming on a PC, Mac, Android, or iPhone, taking control of your refresh rate settings can have a big impact on how smooth and enjoyable your sessions are. It’s one of those tweaks that doesn’t require buying new hardware, but it can totally change your experience.
And once you’ve adjusted your refresh rate, don’t forget to check out NoPing’s Boost FPS to squeeze every drop of performance from your setup. Download NoPing now and test it for free!
